


Decals – the cost effective way to create the look of wall paper, for a fraction of the cost!
For someone like myself who loves change, decals are a highly cost effective way to update a bedroom or any interior space.
I am always amazed at how much of an impact these little packs of removable decals can have on a space and I LOVE how easy they are to apply and reapply.
And over the years of using decals, I have learnt a few little tips and tricks that I thought I would share on the blog today.
Tip 1 – First the most basic, but most important. Follow the manufactures instructions and DO NOT apply decals onto freshly painted walls. You should wait approximately 8 weeks after painting before applying them.
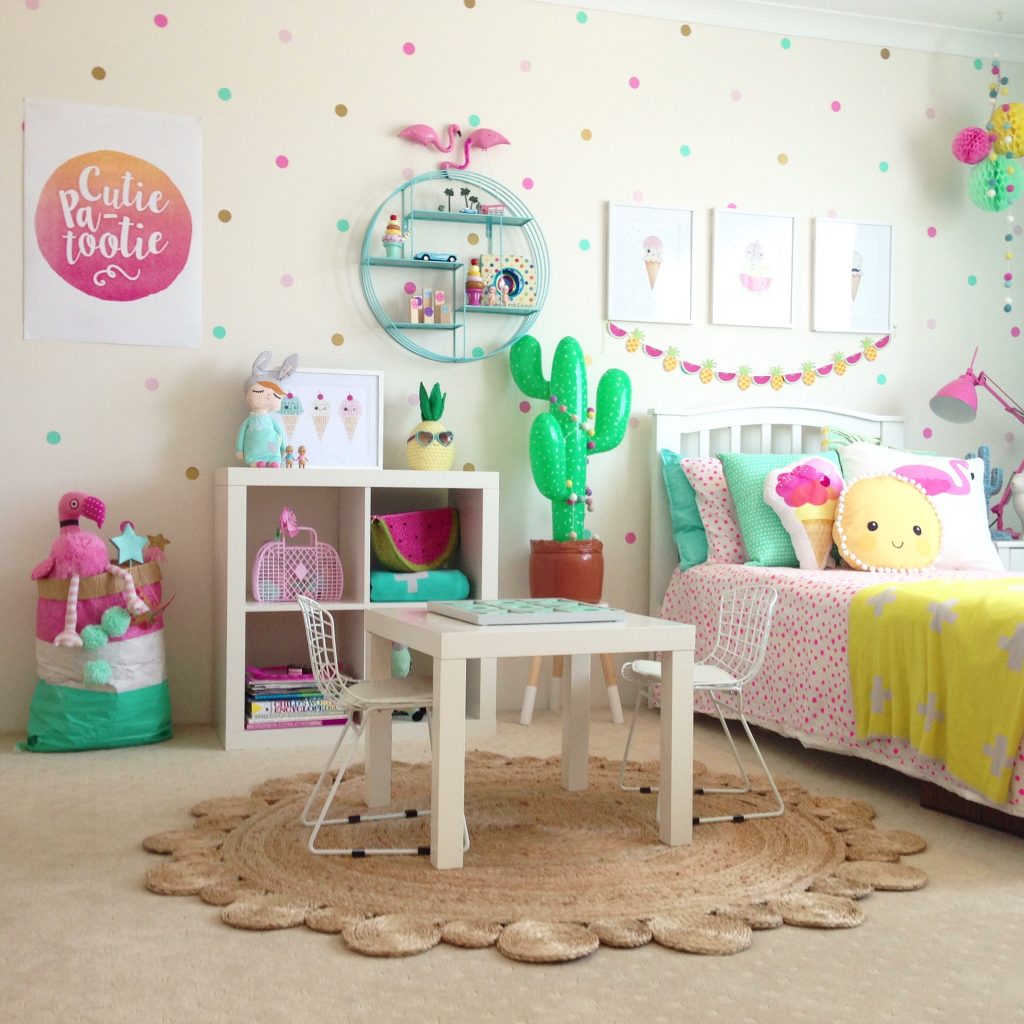
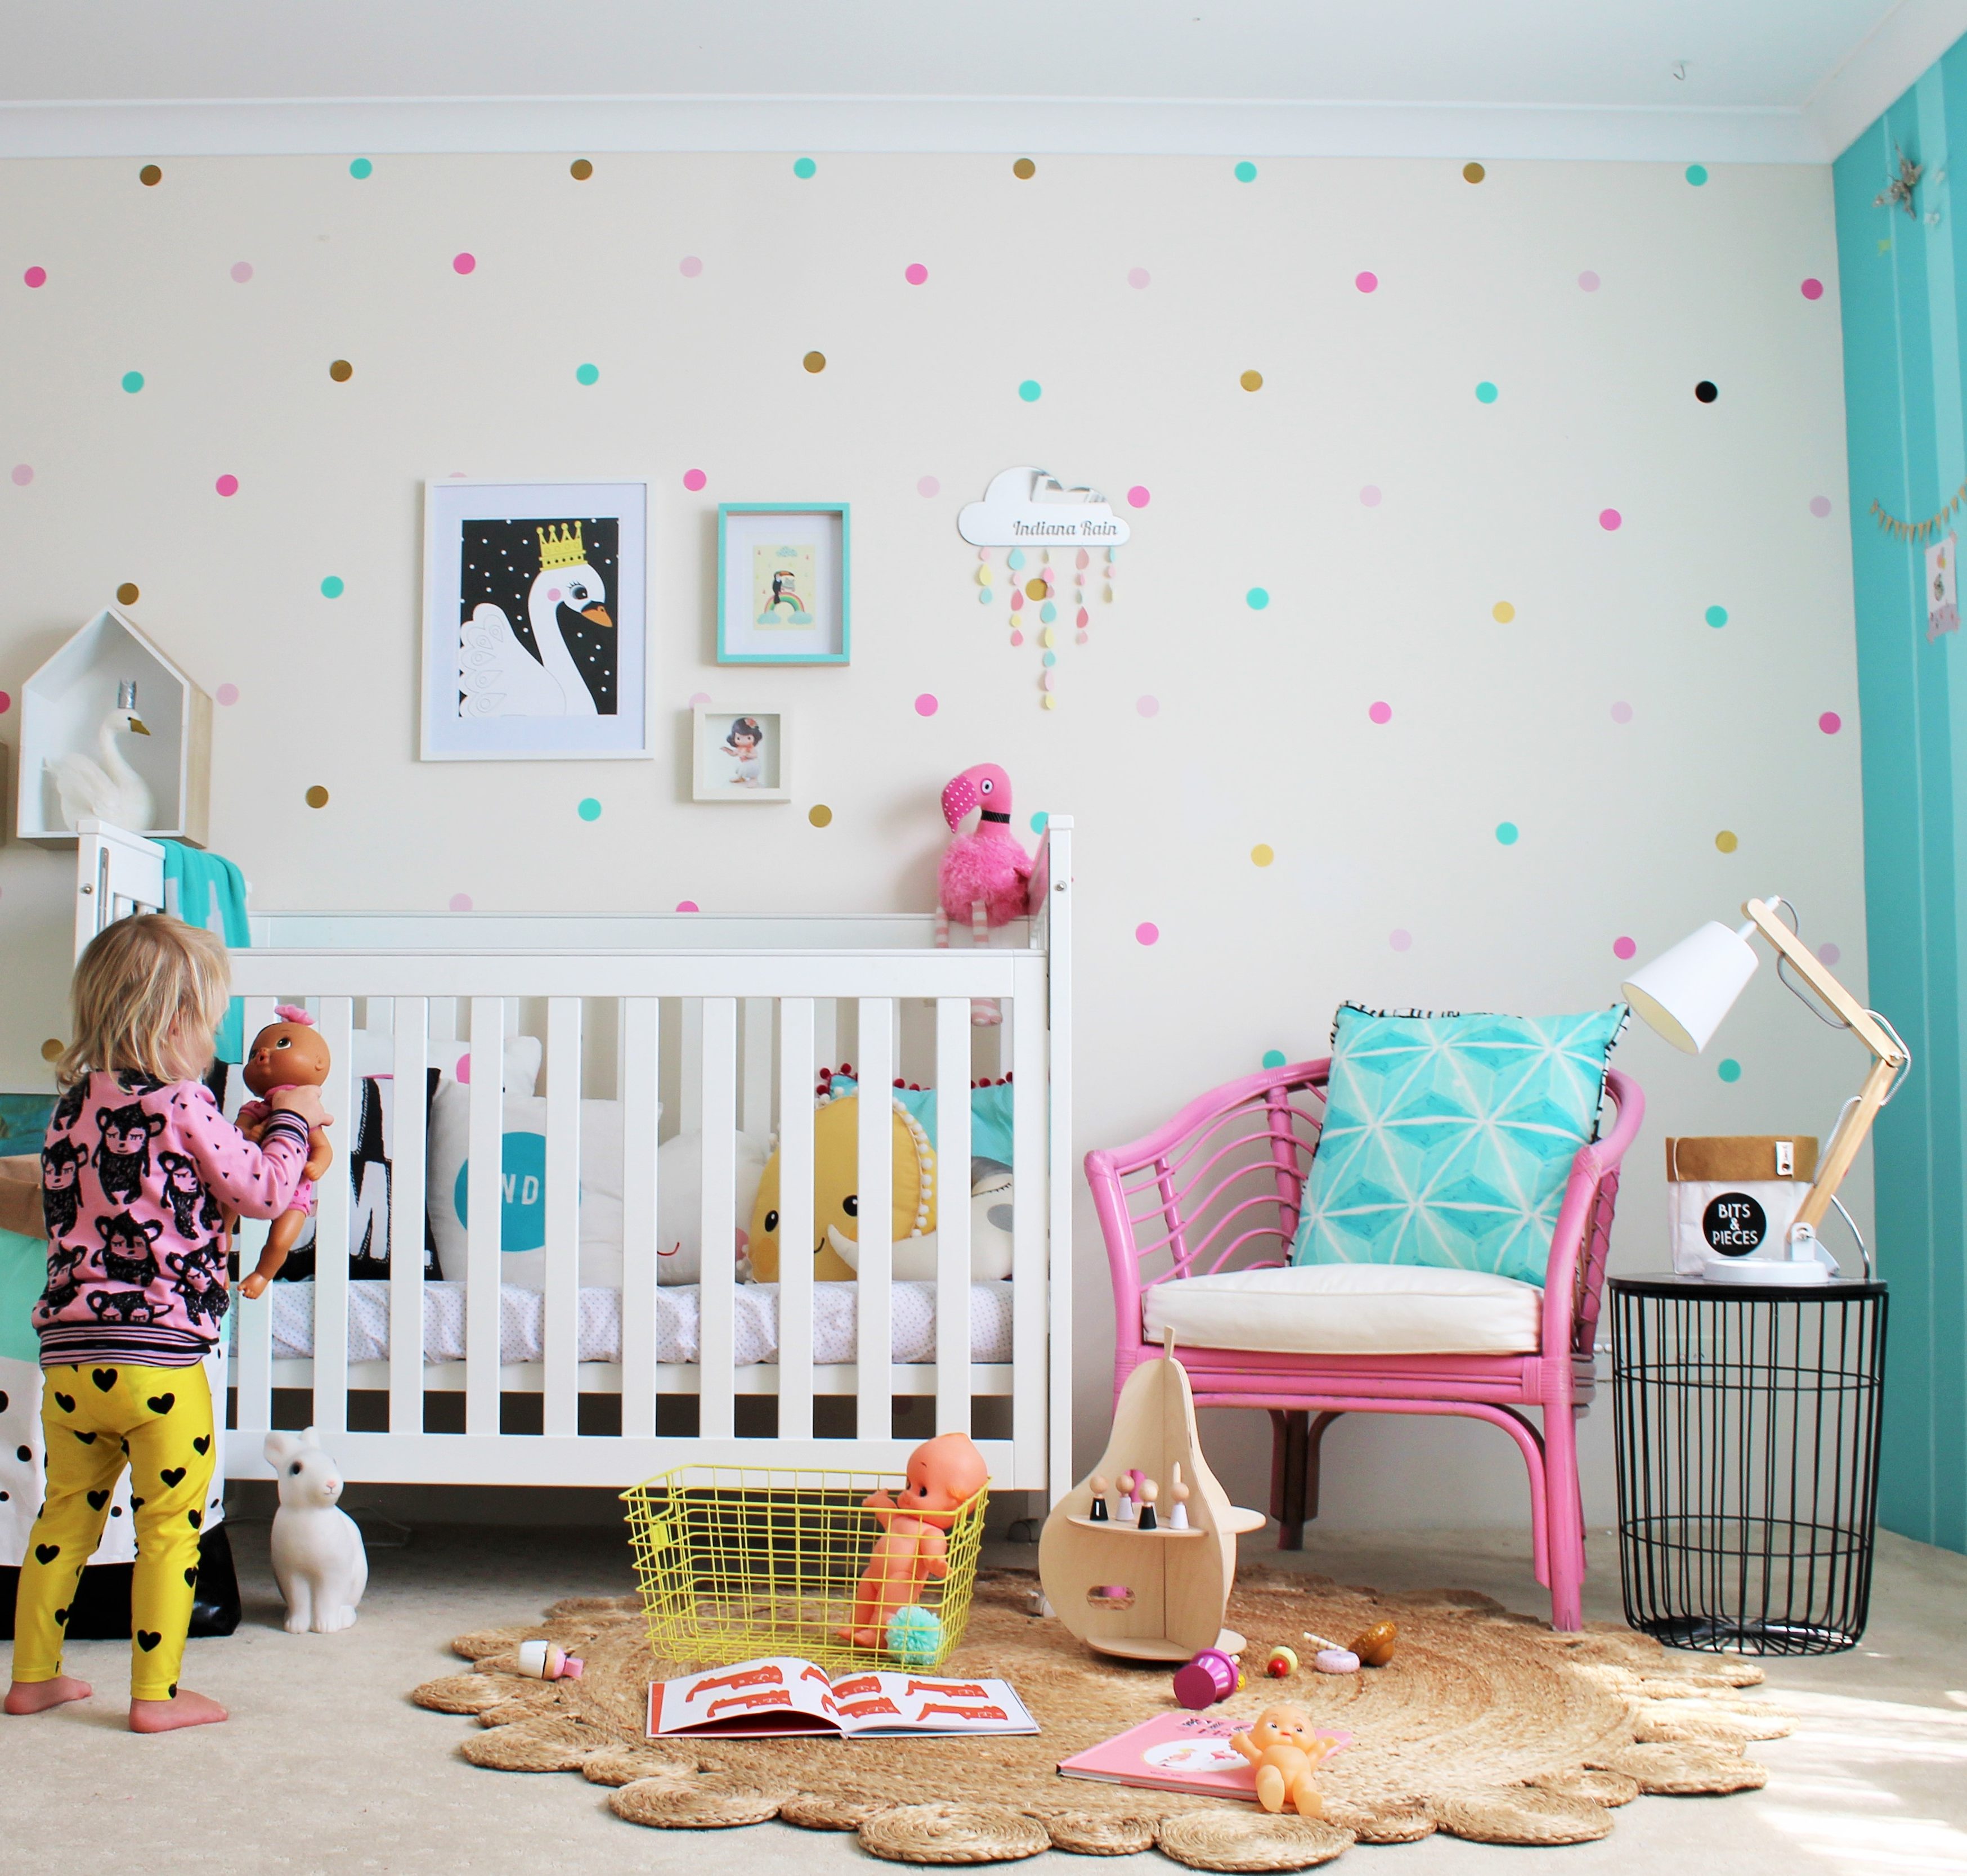
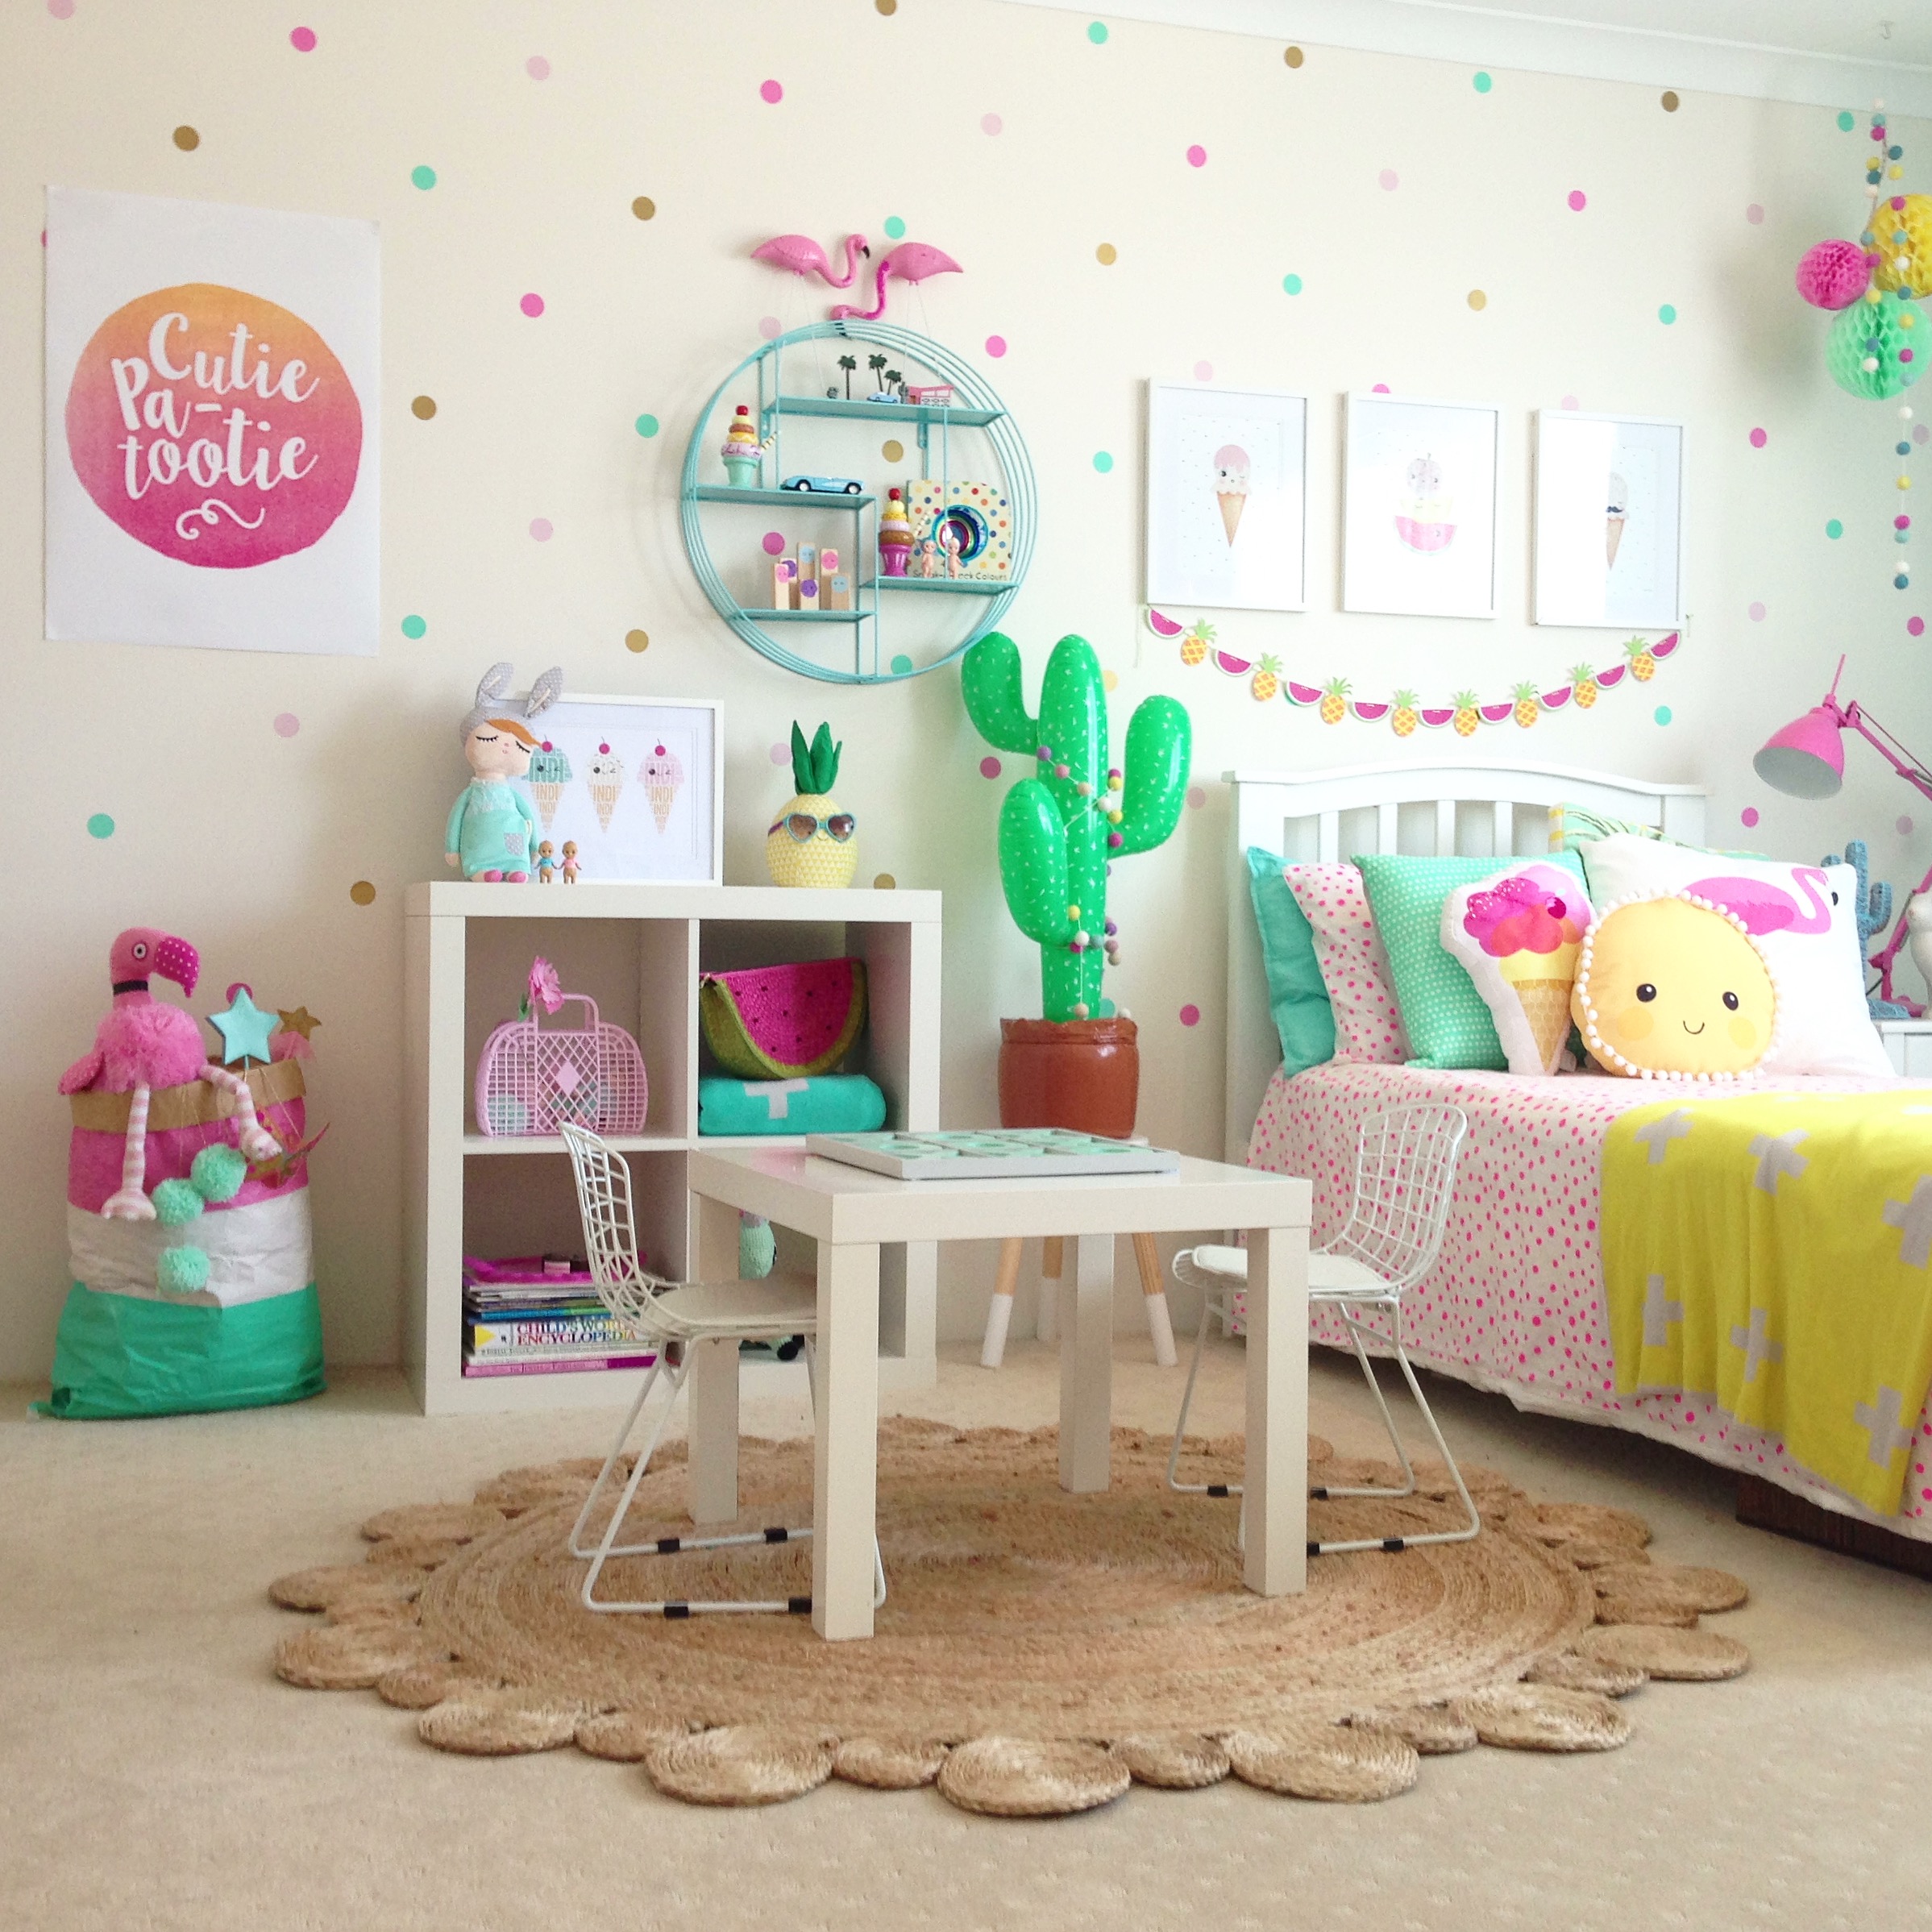
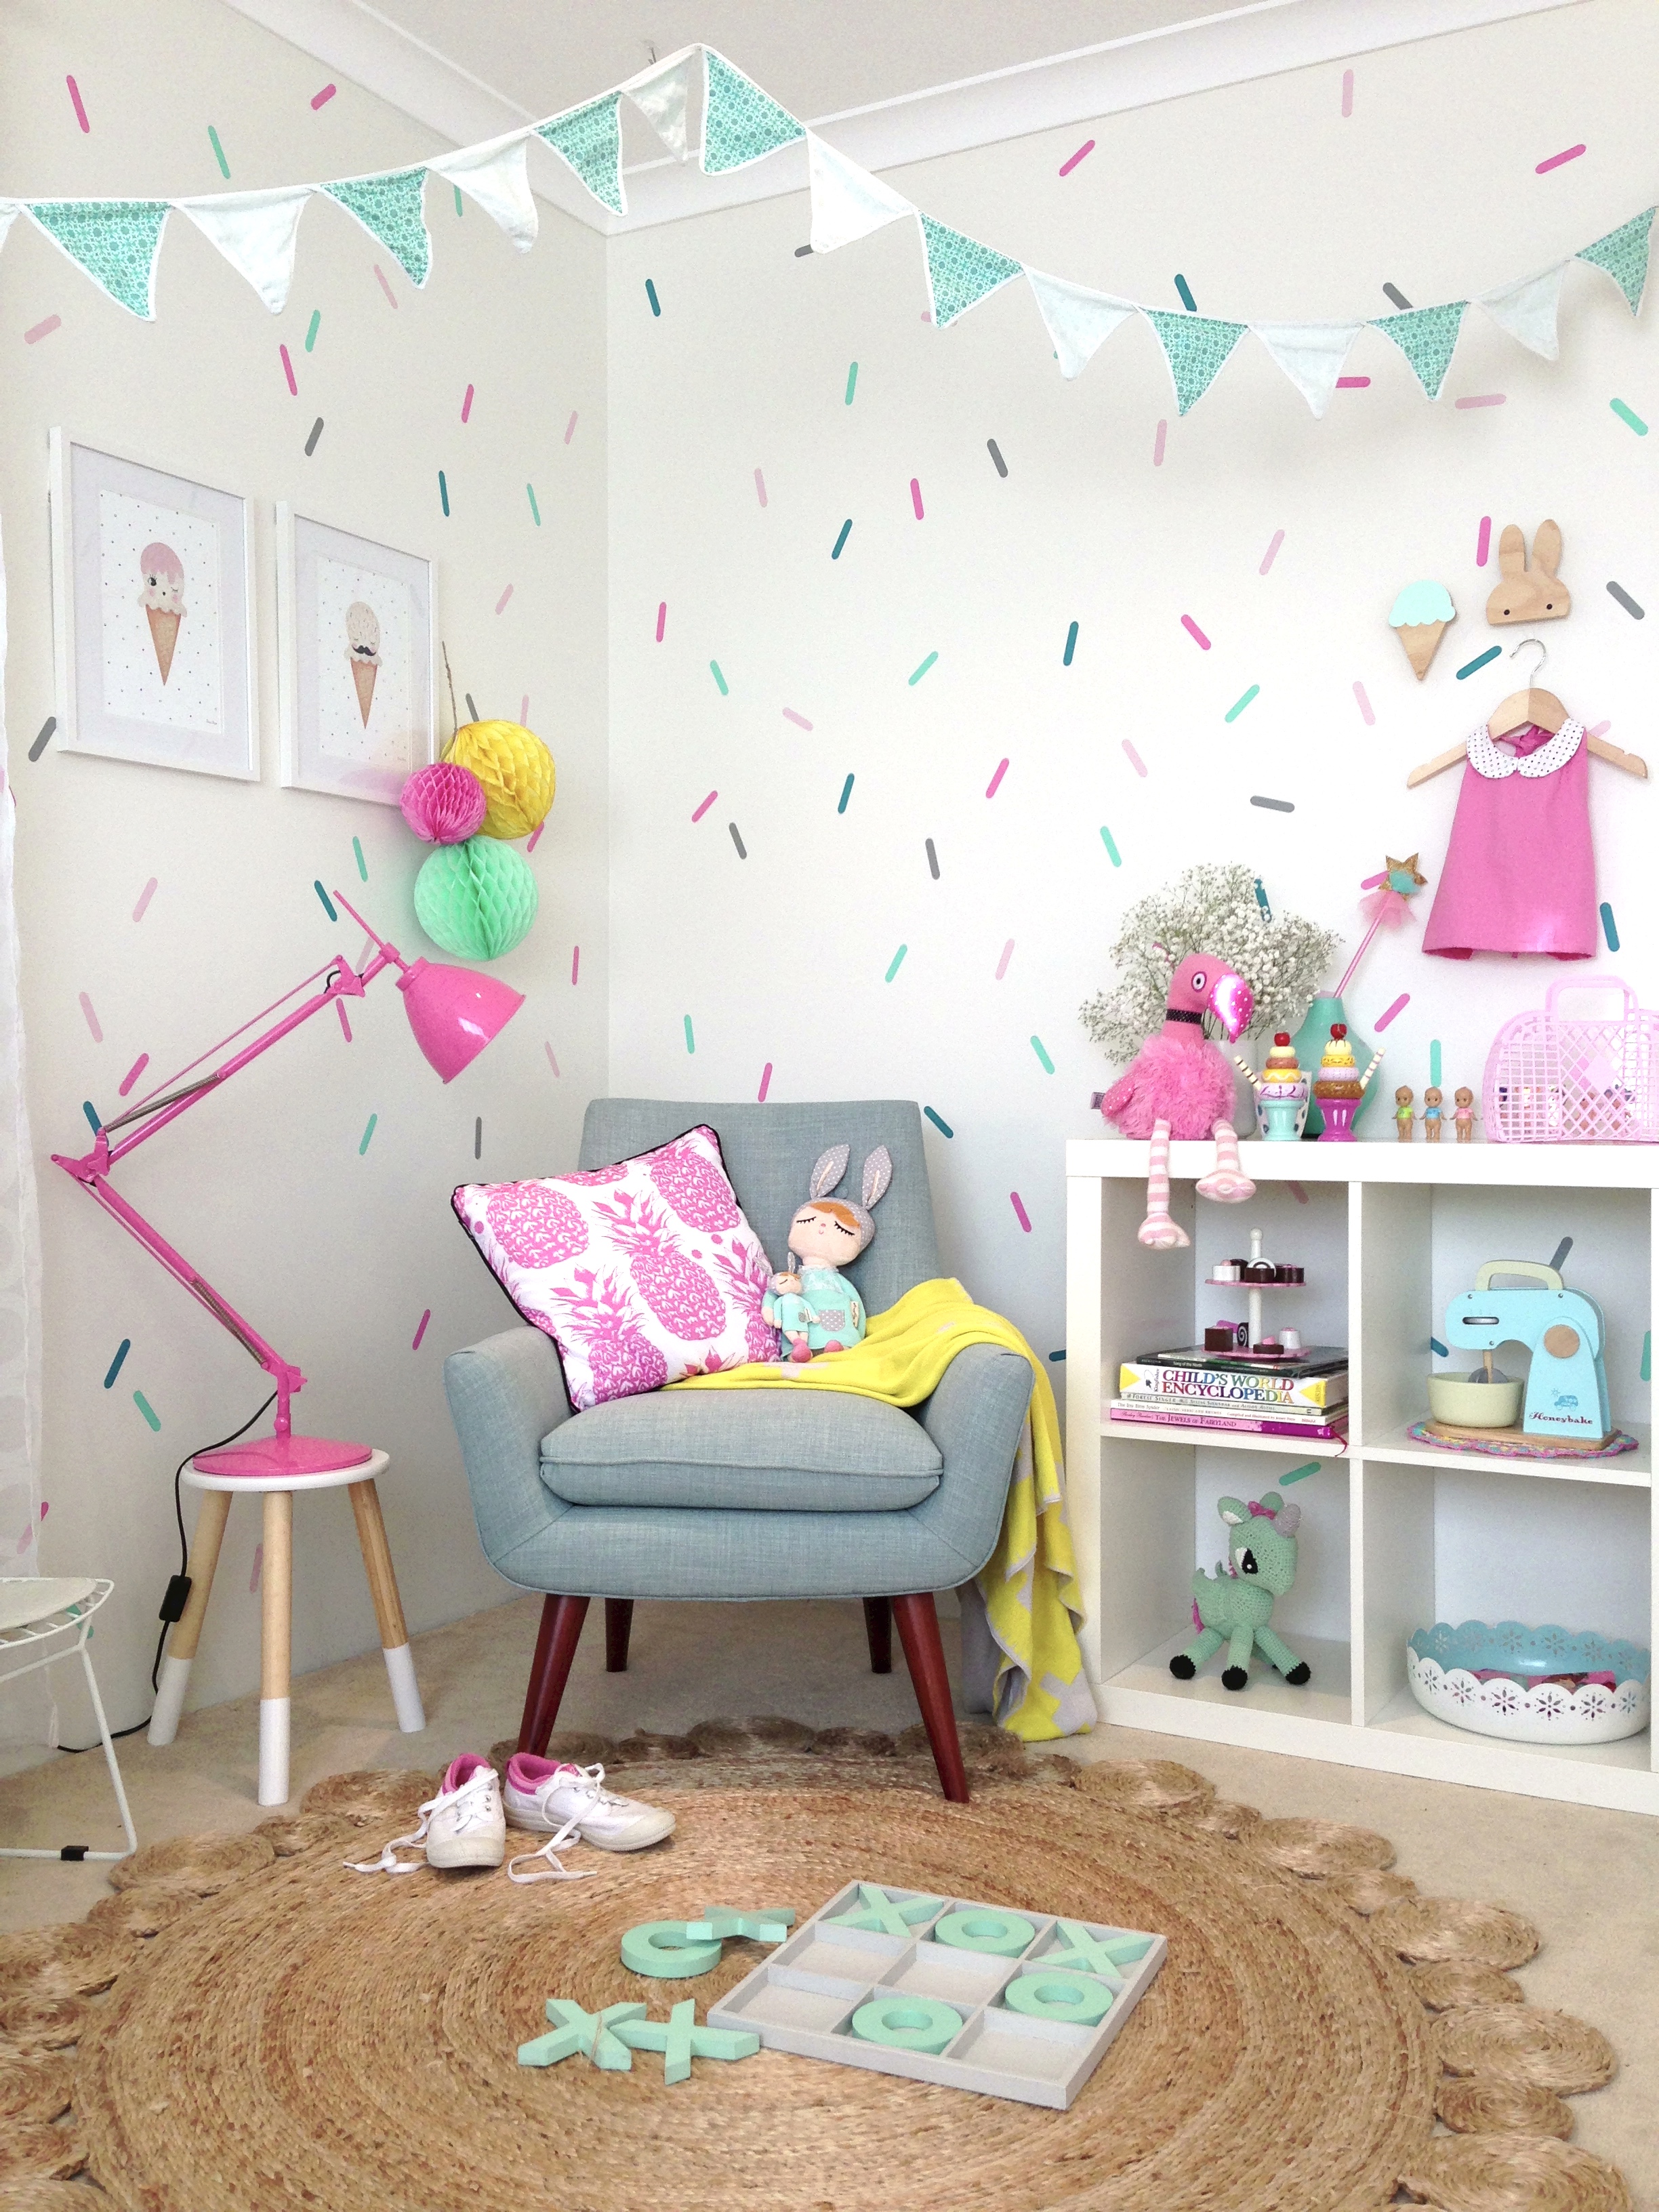
Tip 2 – To create a neatly spaced pattern as seen in the images above and below, use a square shaped piece of card or paper (scrapbooking card is perfect) as a template.
Fold the square in half, then half again and use the crease marks as a guide to apply the decals. Starting in the top far corner of the room, apply, move and repeat! Simple, perfect spacing every time!
Tip 3 – Buy quality. There would be nothing worse than using decals only to find 1 – they do not stick or 2, they stick sooo well that they rip the paint of the wall!
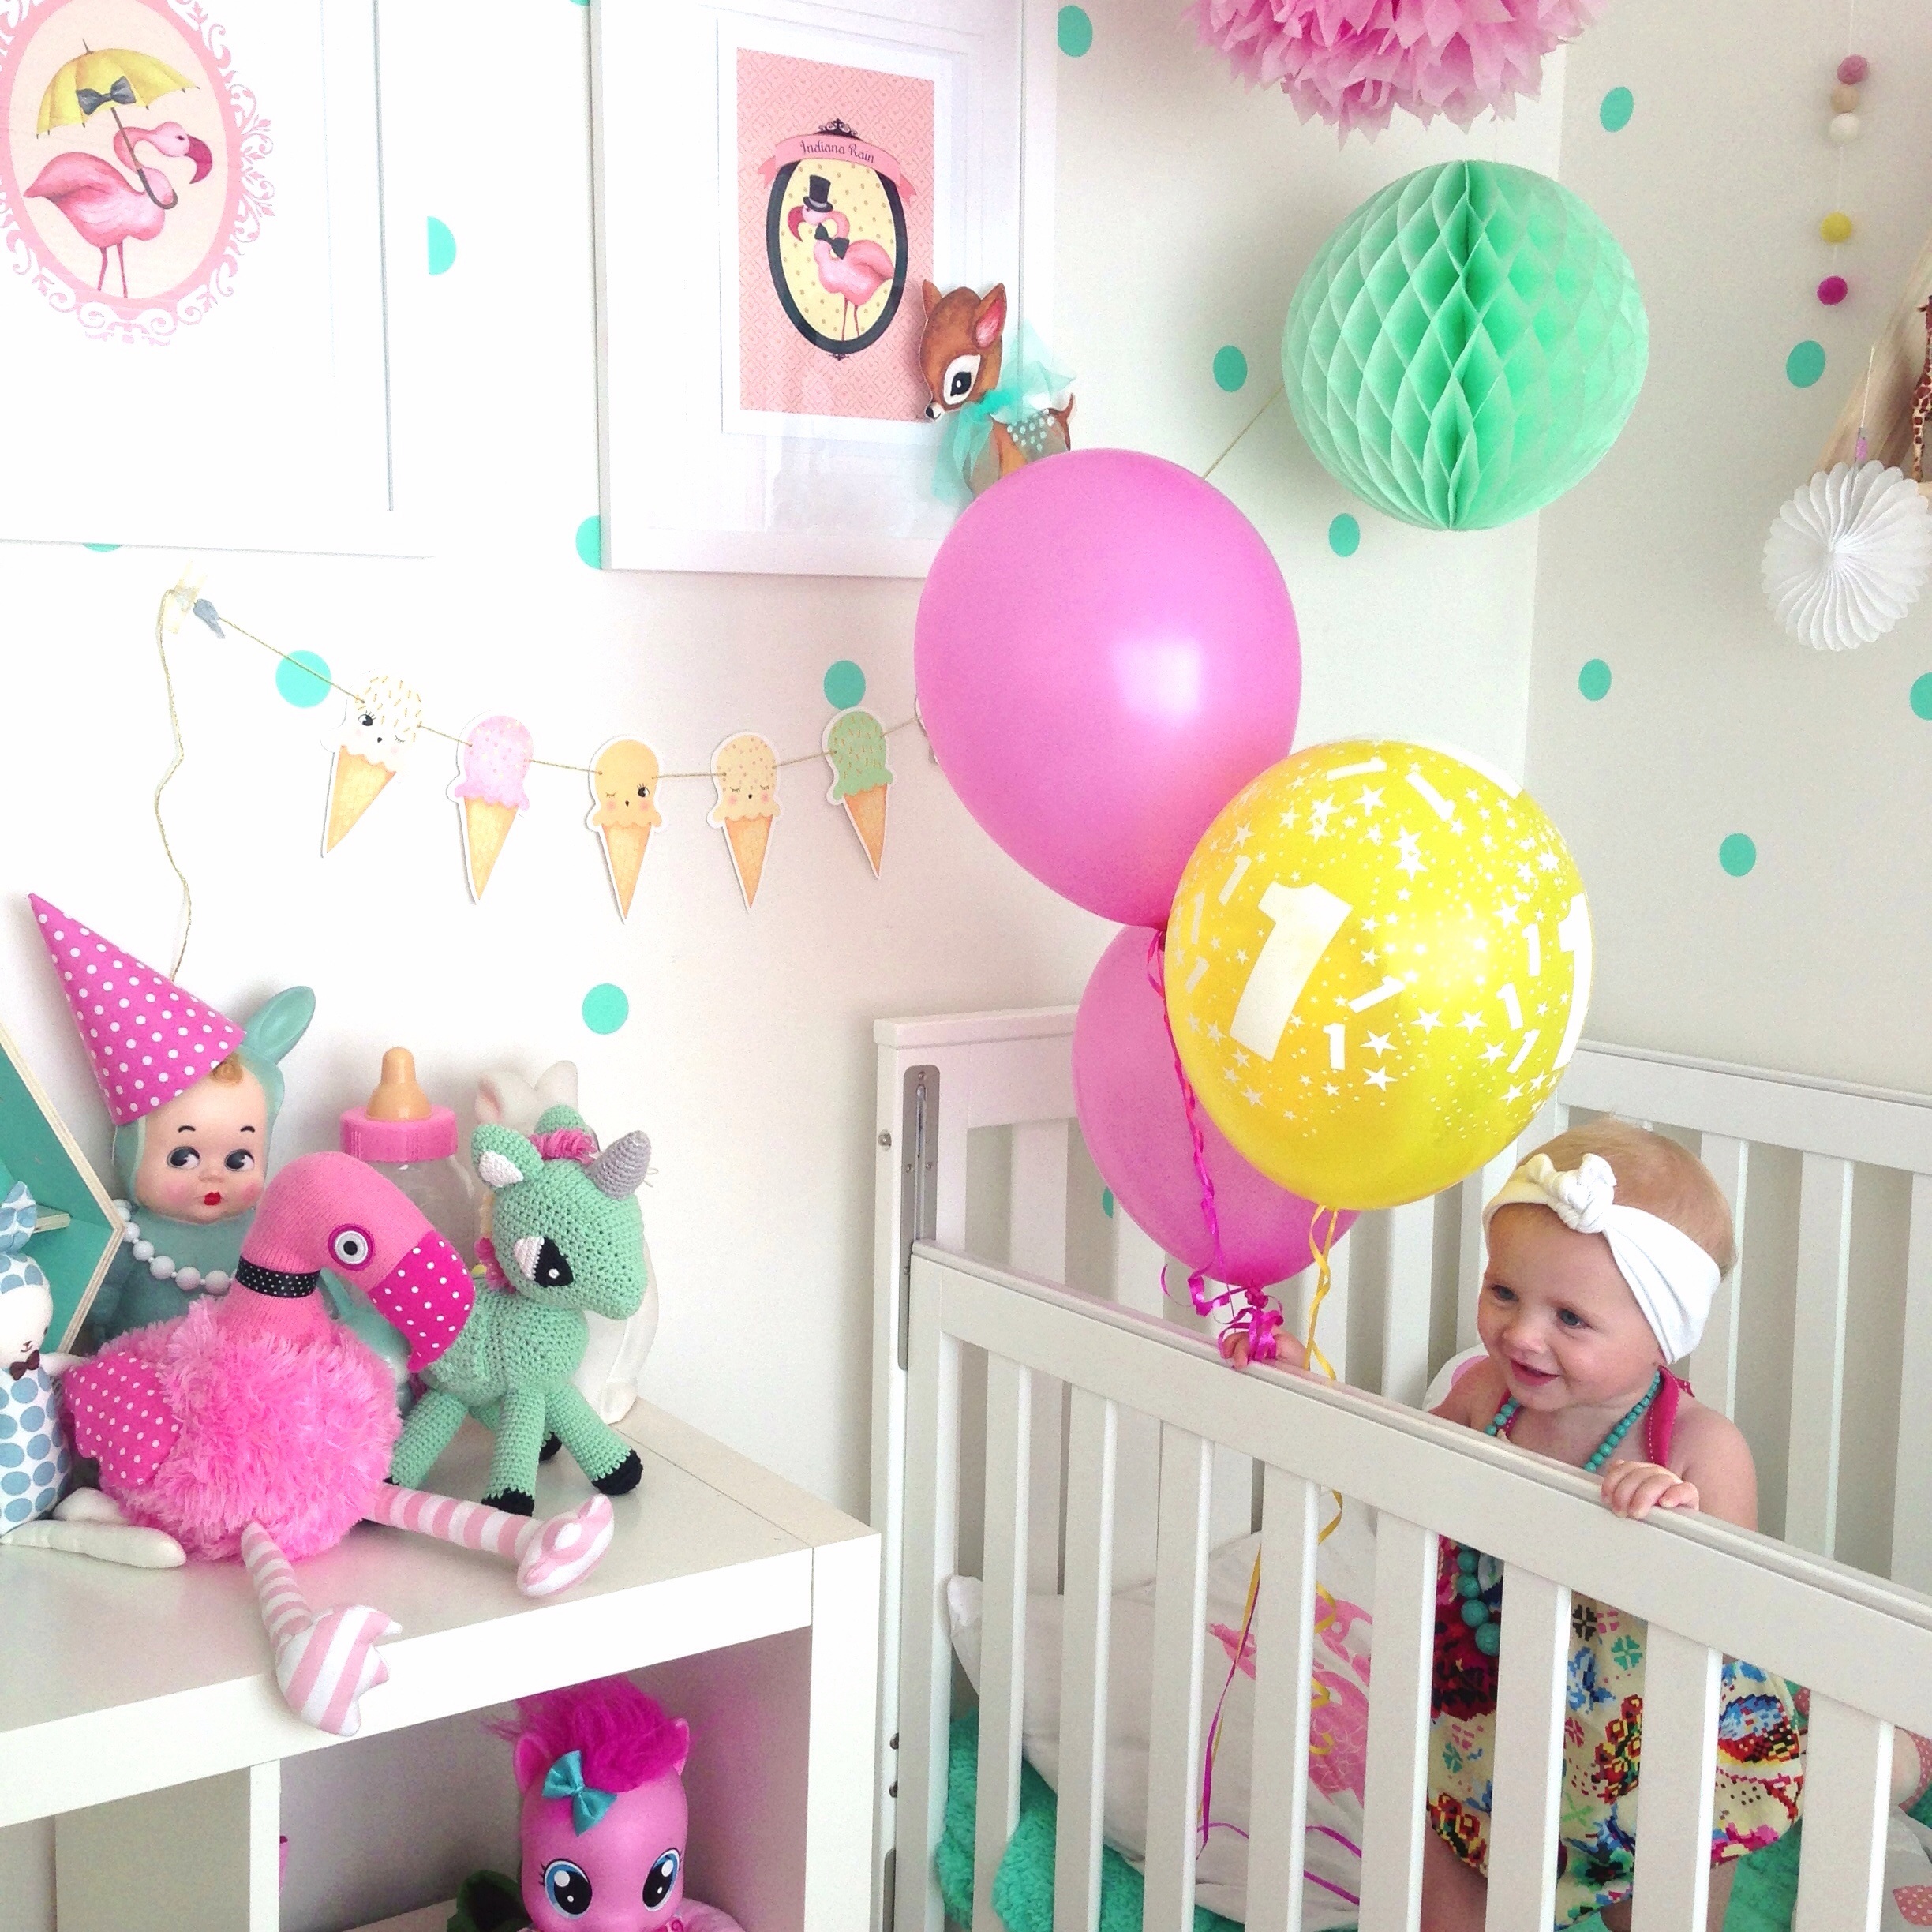
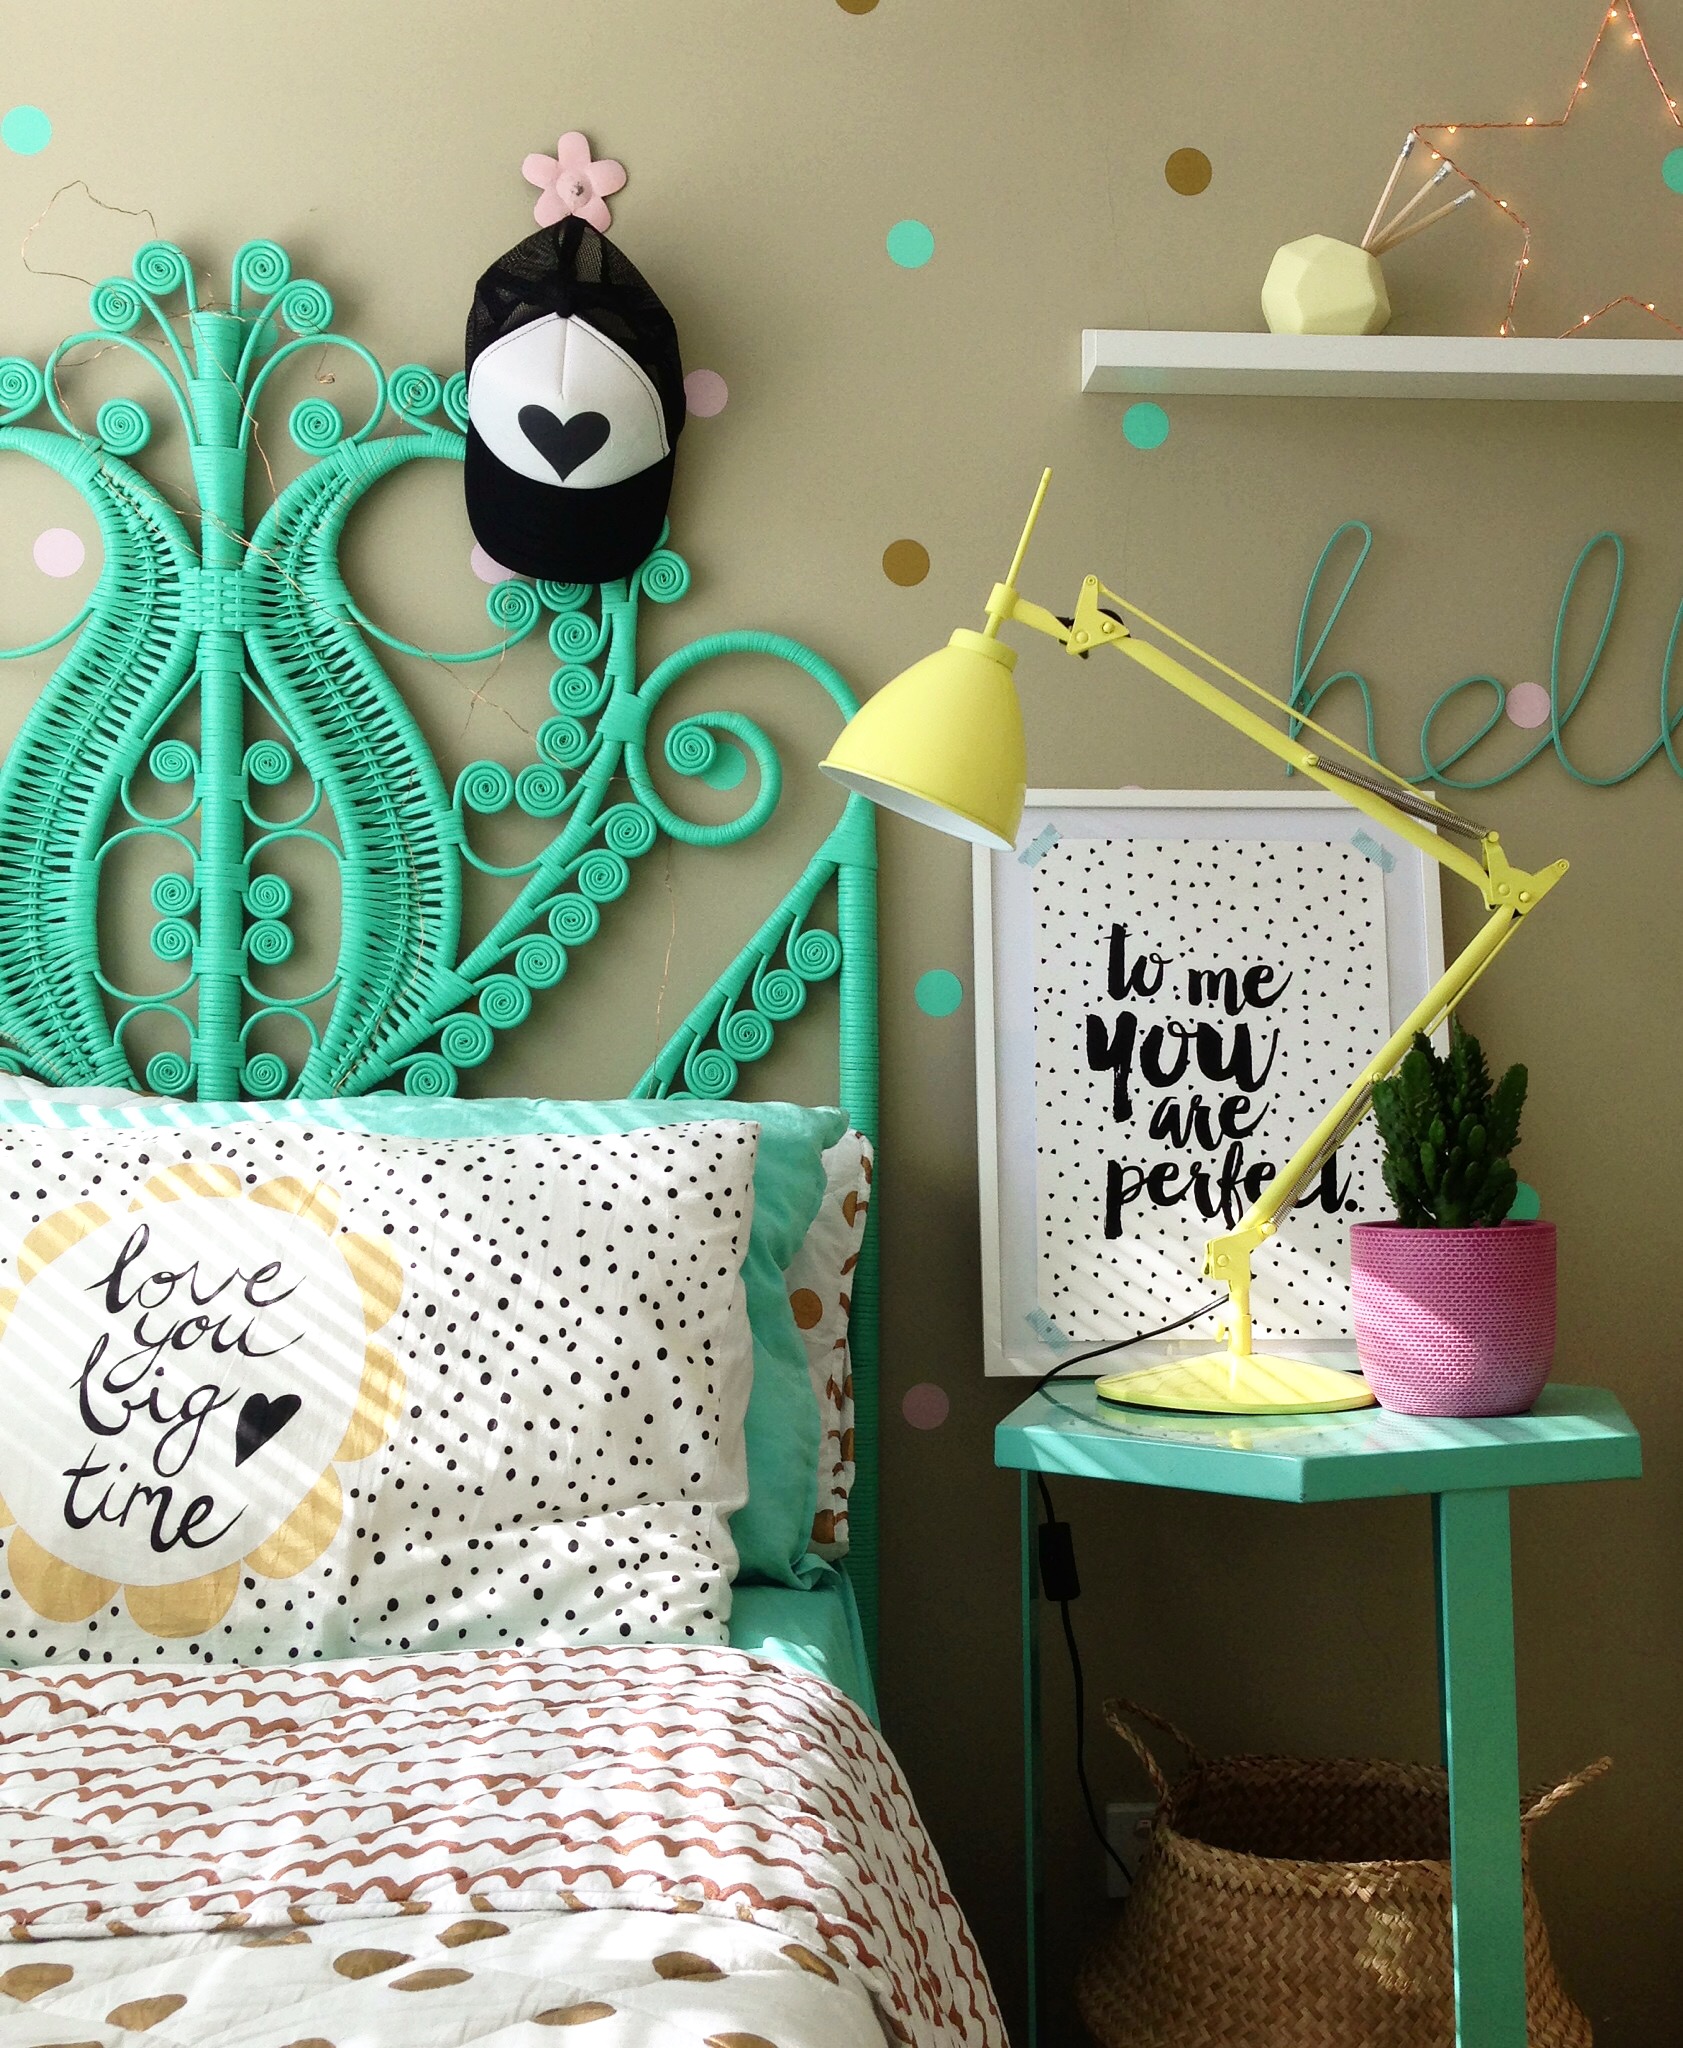
Tip 4 – Combine colours for a different effect. While a single colour can pack a punch, combining two or more colours and applying in a pattern can add that extra element of WOW to a room. It can also help to tie in an existing colour scheme to create a beautiful, cohesive look.

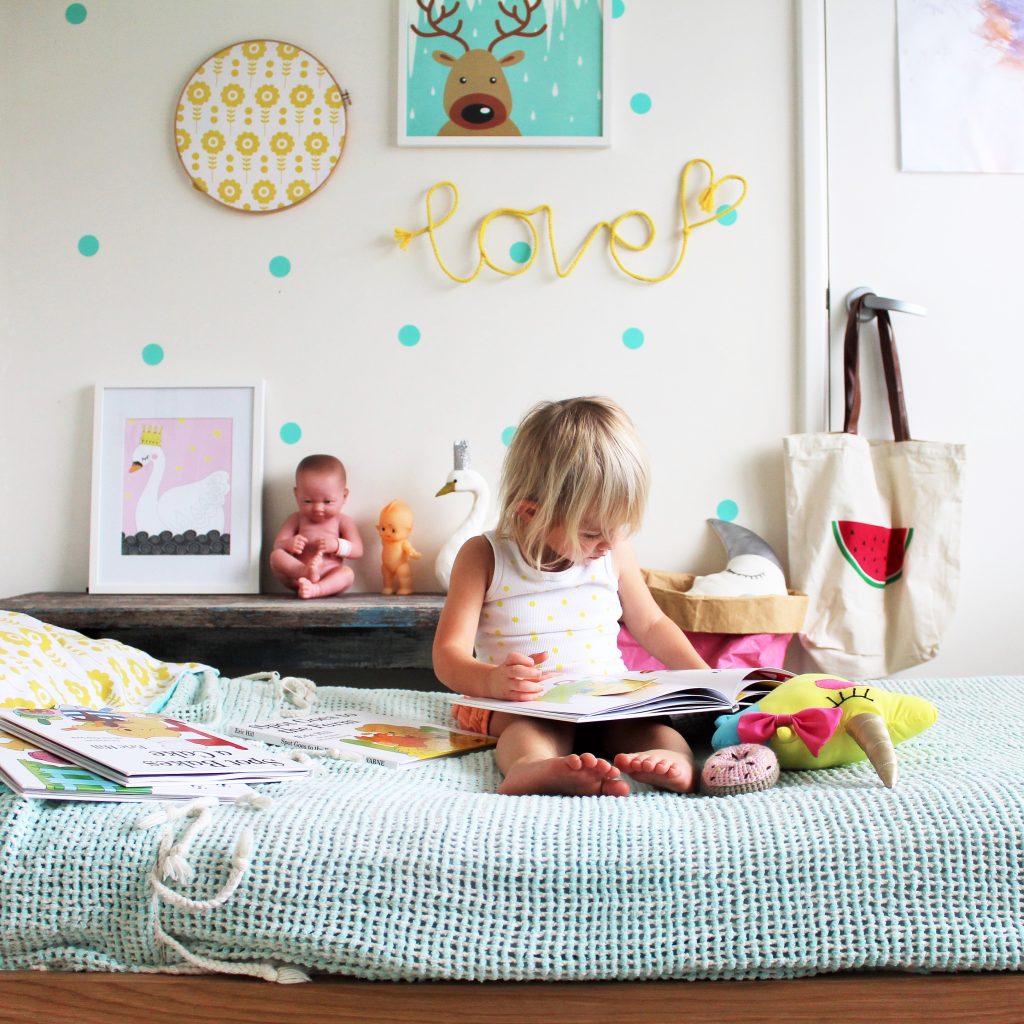
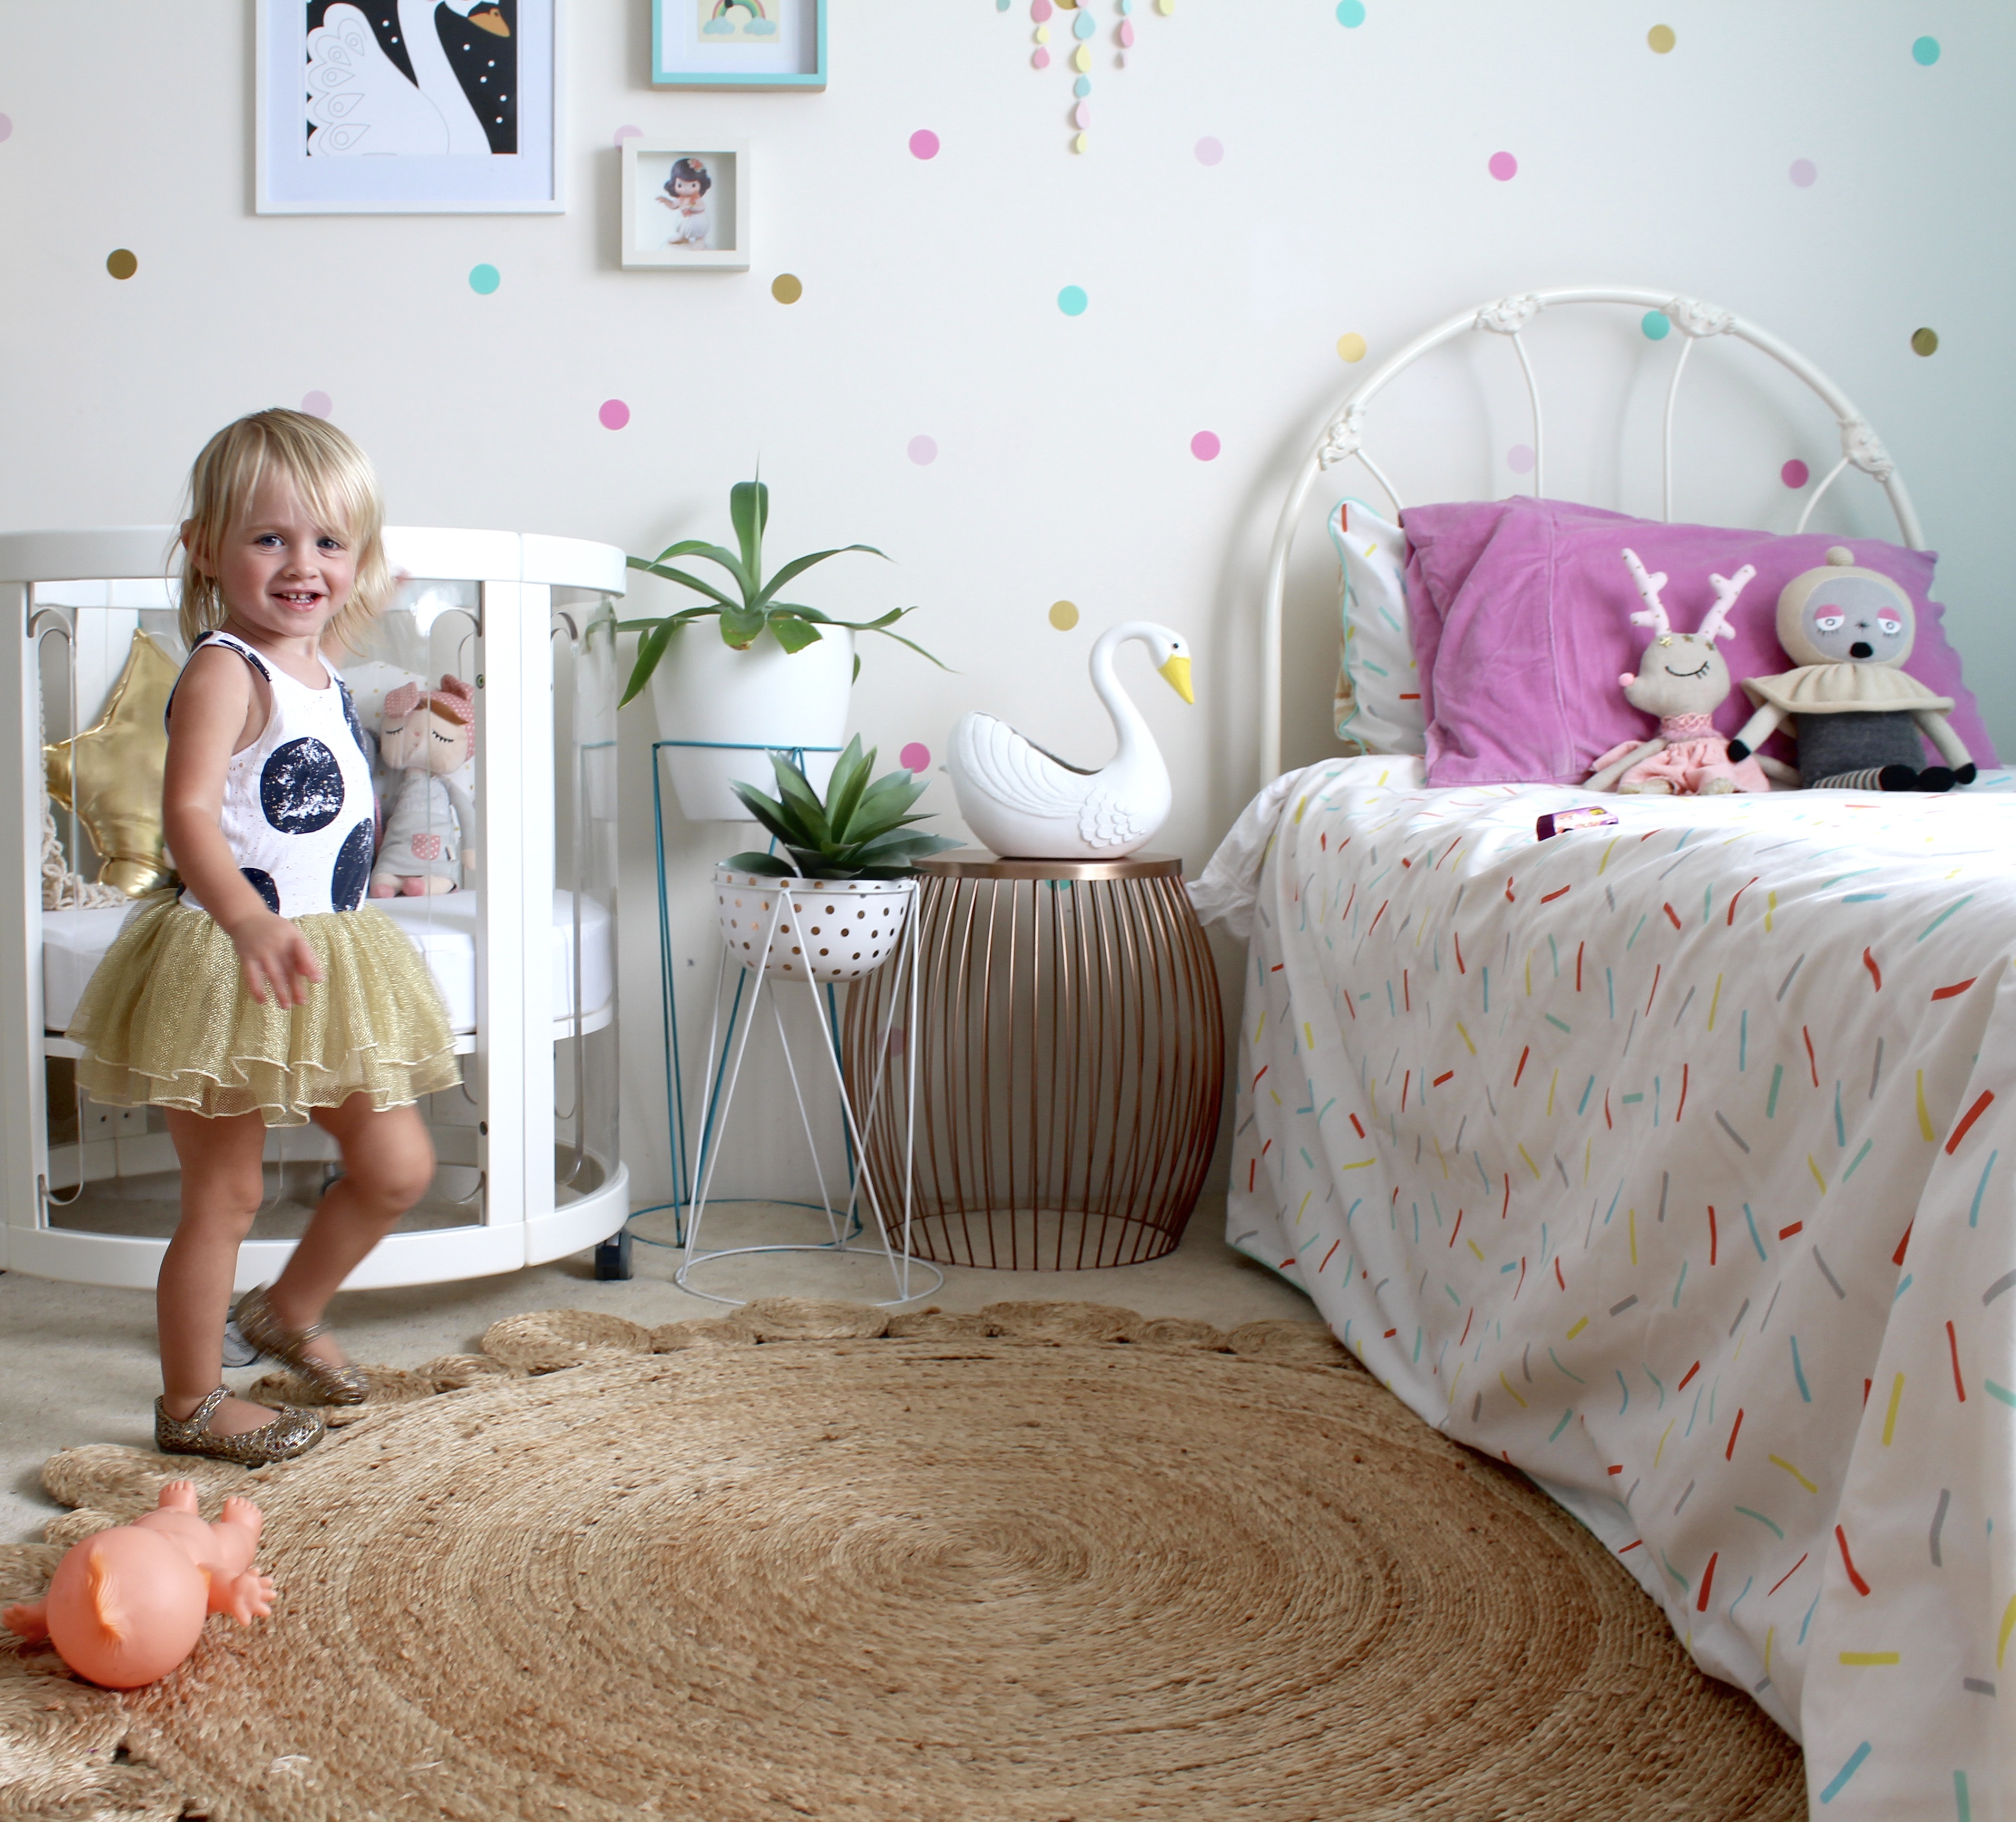
Tip 5 – Ignore previous tips and go random. If you don’t favour the ‘structured’ look of perfectly aligned decals, you can create a very cool ‘sprinkled confetti’ look. While this random pattern appears easy, it can take a little readjusting to make it feel balanced in an unbalanced kind of way. If that makes any sense at all.
Tip 6 – Last but not least, if you do decide to take the decals down, remove them carefully and stick them onto a plastic A4 book binder insert. This will keep your decals safely tucked away just incase you decide to reuse them at a later date.
These are just a few tips for some fun ways to use decals to add interest to a child’s bedroom. For an alternative decal look, you may also like the ‘half wall‘ look I created when I last changed Ocea’s room around which can be seen here.
Thanks for stopping by,
love ness X
Using decals were never in my mind before, but now that I look at these fantastically styled rooms, I want to get some cute decals for my daughter’s room. Thanks for the pretty examples and for giving me ideas. 🙂
Thanks Linda, until I tried them in my girl’s room I was never really into them either but they can make such a huge difference. They are especially great for kids rooms as their taste and style changes throughout the years – so easy to change. X
Where do u get the circle decals from? Such a lovely design I want to try and recreate in my daughters room. Thanks
Hi Eve, mine were from Vivid Wall Decals X
Thanks for the info. Your room looks great. What size decals do you use to create the look with the multi coloured circles? Thanks eve
They were approx 4cm in diameter x
Hi. What size circle decals do you use they look amazing?
Thanks
Eve
Hi Eve, they were approx 4 cm in diameter x
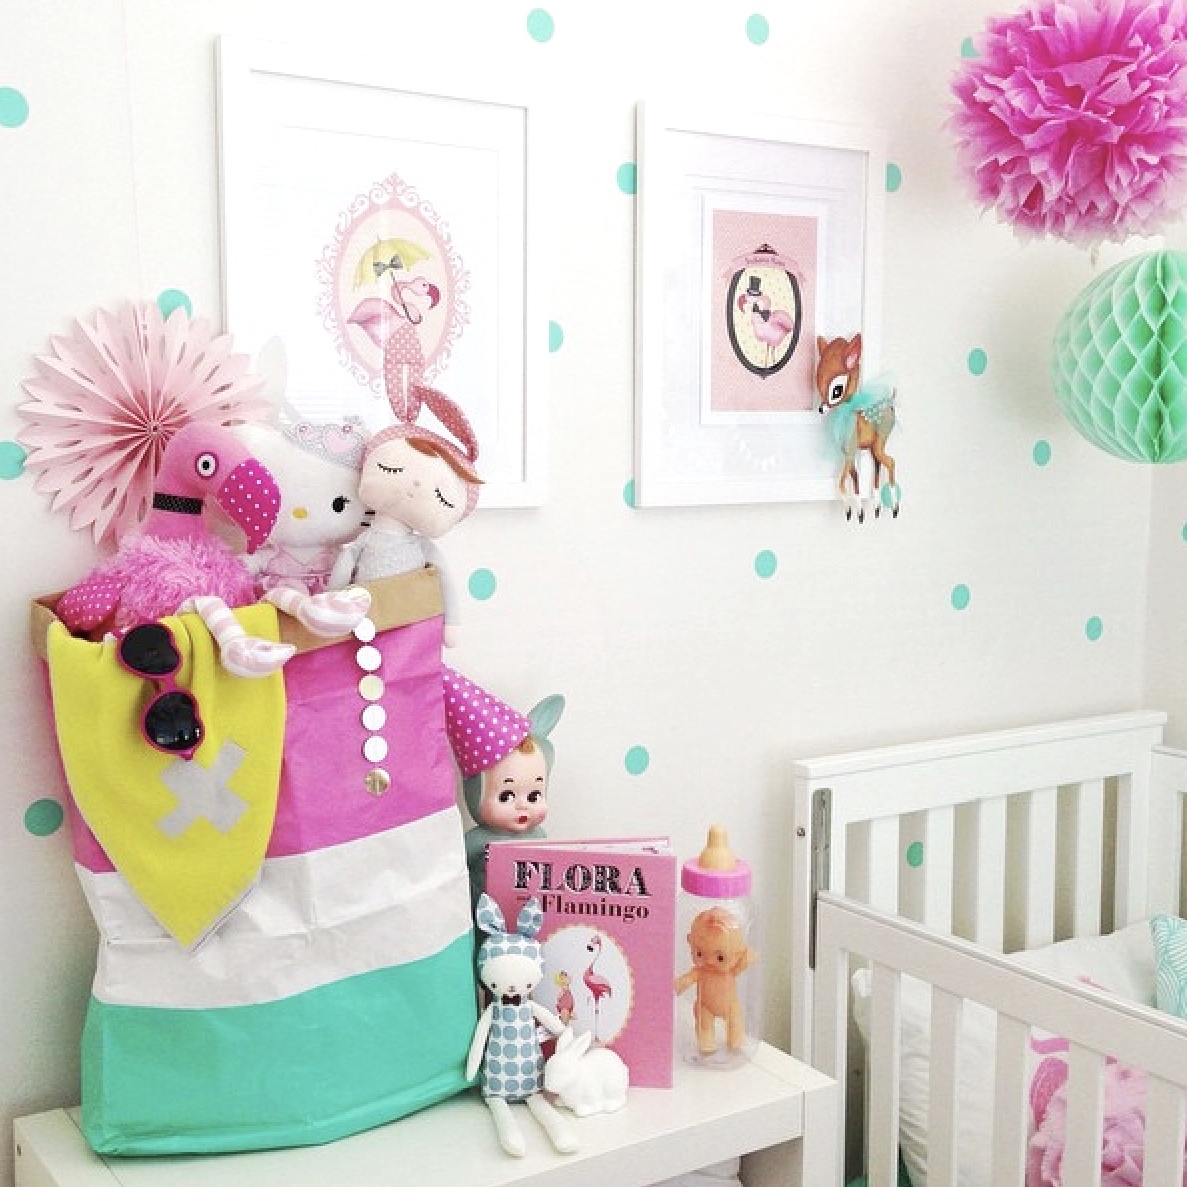
HI,would you mind letting me know where did you get those sprinkle confetti decals as cant find them anywhere?Looked on Mimi lou website as well
Hi Anna, just replied on the other message – but they are from http://www.vividwalldecals.com.au, the direct link is http://www.vividwalldecals.com.au/shop/sprinkles-wall-decals/ X
Hi Ness!
Love your blog! Can you tell me where the grey chair is from in the picture that has the sprinkle wall decals. It has the pink pineapple pillow on it? I love it and am looking for a chair for my daughters room that size. Thank you!!
Hi Bri, Thanks so much! The grey chair is from Freedom Furniture, hope that helps X
Hi!!! These are great tips. Can you recommend colour combinations (3-4 colours) fo a boys room? The boy is 4 years ols, I would rather not place pink or turquoise mix for him, but sth more boyish;-) thank you!!
Hi Joanna, I’d say a great place to start is to look at what your little boy’s favourite colours are. Also, if you look through his clothing I’m sure you will see a pattern emerge in the colours you favour as everyone is drawn to specific colours (these may be reds, blues, greens or more neutral greys).
These are obviously the colours you love and the best part is, if you choose your favourite tee or jumper of his, the colours used on the print obviously work well together (as a clothing designer has already chosen them) so this can be a great source of inspiration.
Where did you get the yellow blanket with the + sign? I’ve looked everywhere for one!
Hi Tarah, it was from http://www.adairs.com.au – a few years ago now though X
I am completely obsessed with the rug, where did you get it from?
Hi Faye, it was from Target (a few years ago now though) xx